Add Google Forms responses to HubSpot as contacts
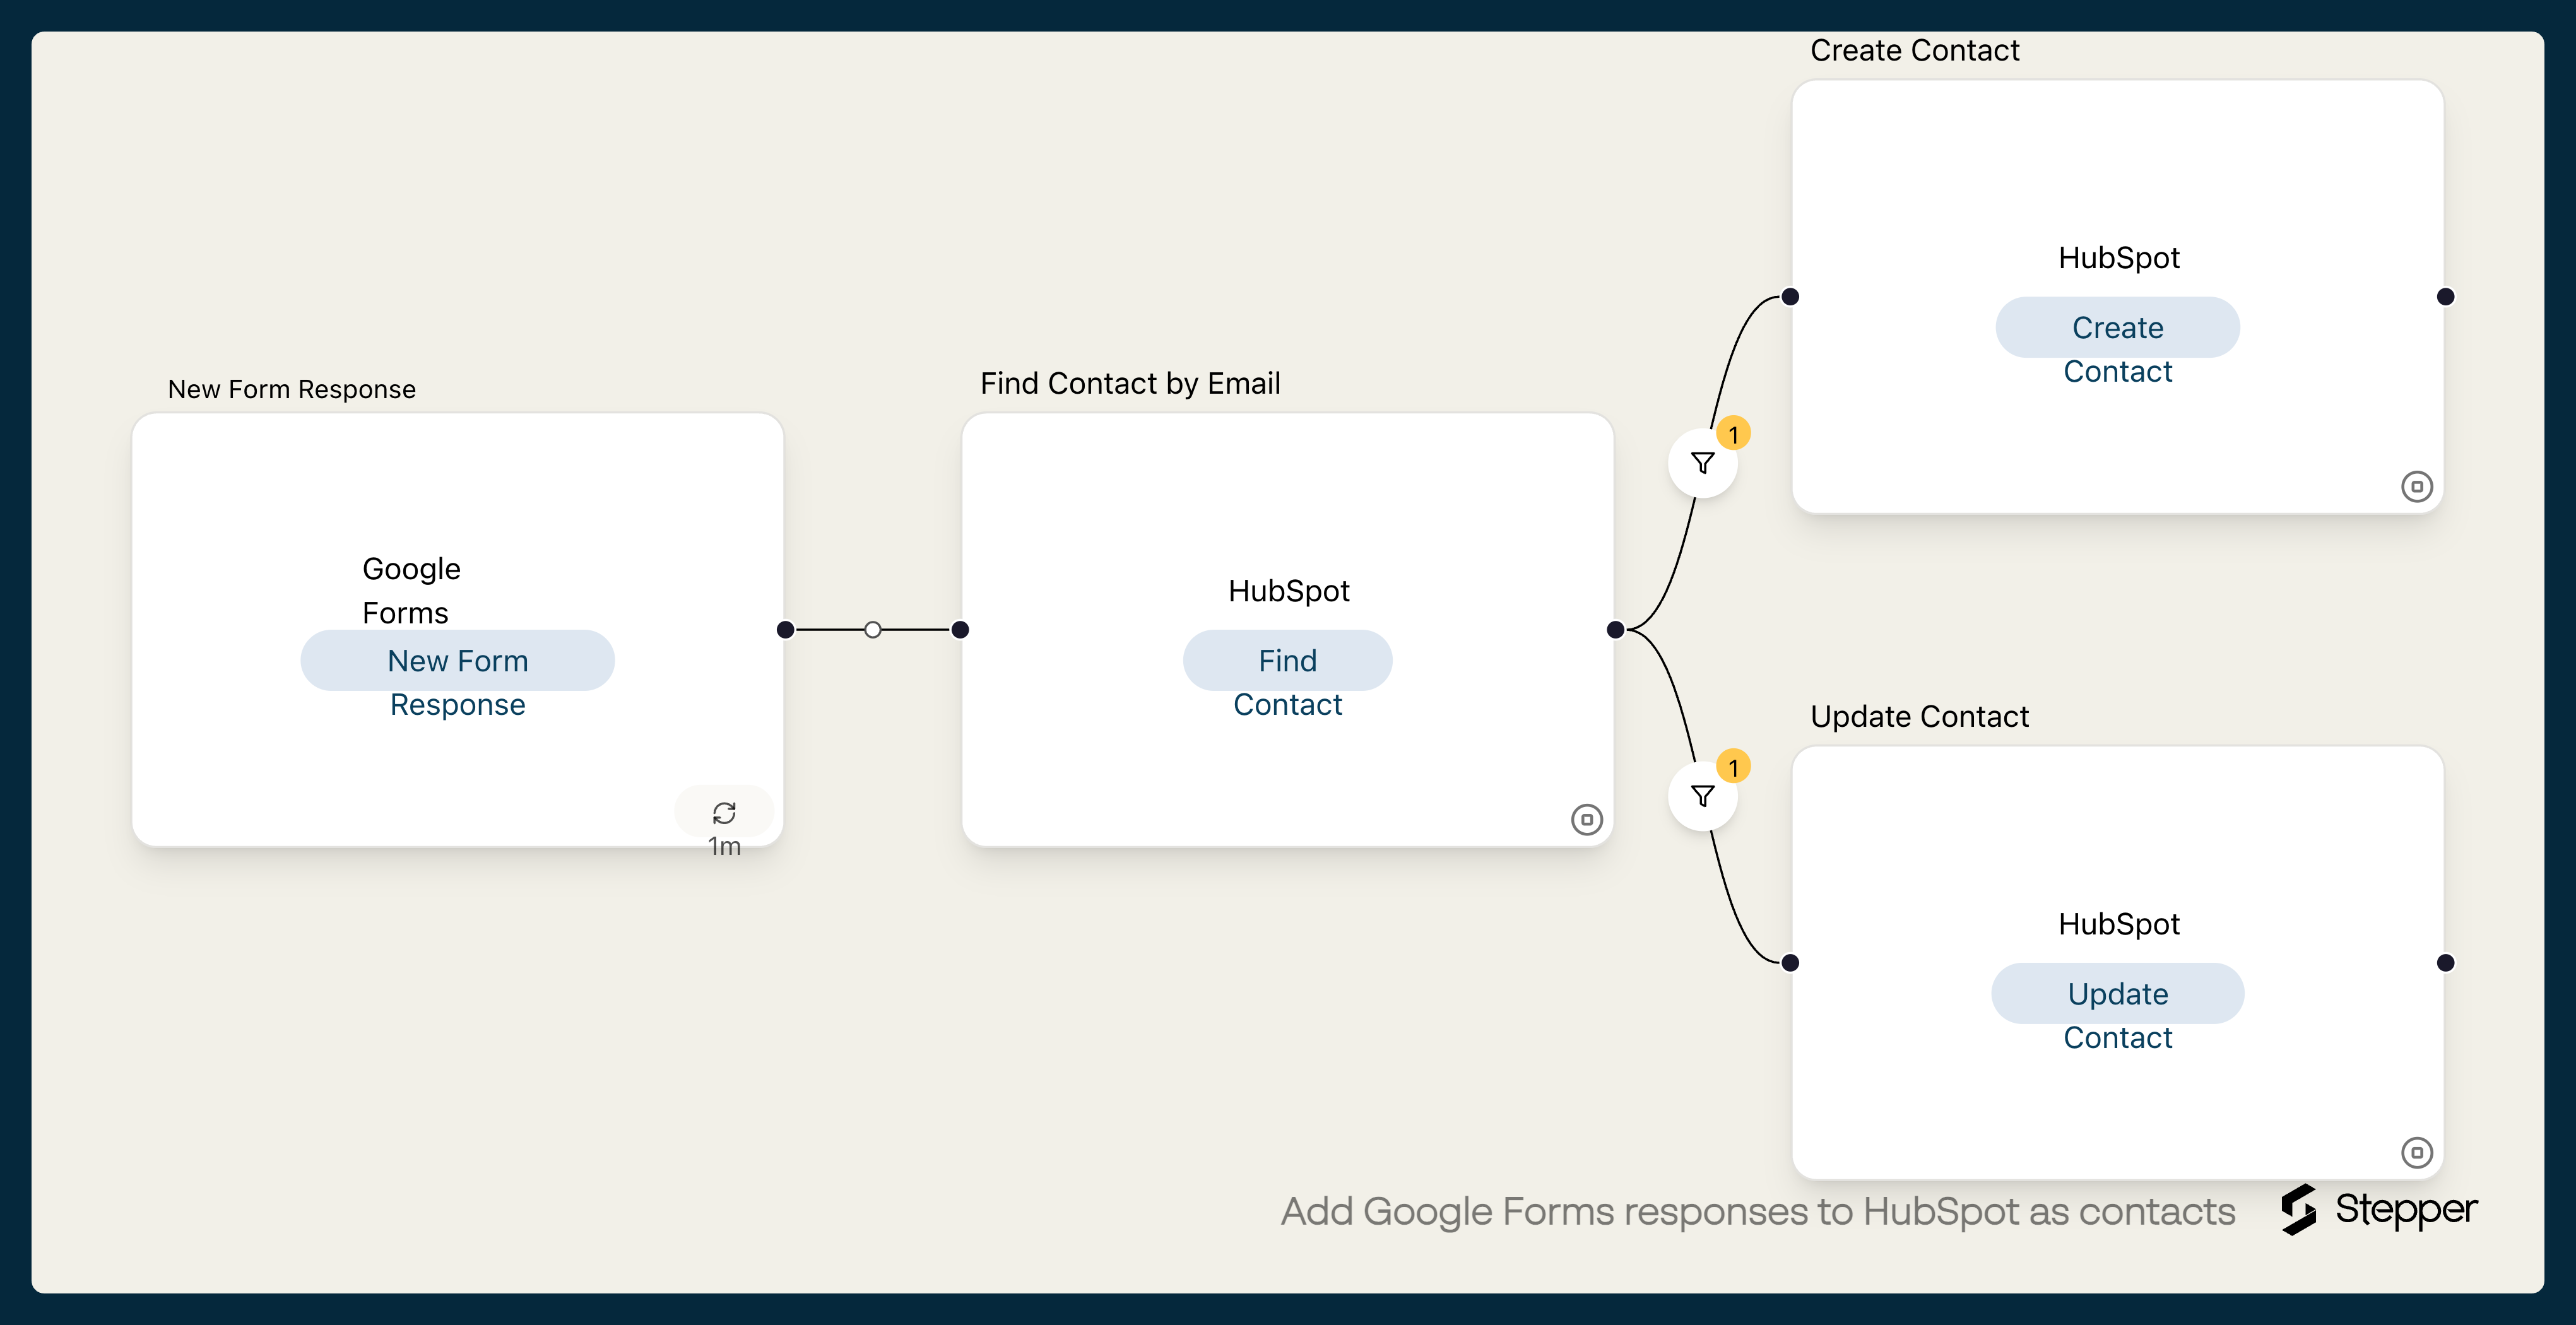
Add each Google Forms response to HubSpot as a contact. Stepper looks the person up by email first, so it updates an existing contact and doesn't duplicate it.
Last checked
What it does
If your inquiry, sign-up or event form is a Google Form, HubSpot doesn't know about the people who fill it in until someone exports the responses and imports them.
This workflow sends each new response to HubSpot. It searches for a contact with the respondent's email address. If there isn't one, it creates the contact with their email and company, and the Name answer as the first name. If there is, it updates that contact's company, so people who fill in the form twice stay as one contact.
The steps
-
Google Forms: New Form Response
Starts the workflow when the form you choose gets a new response.
-
HubSpot: Find Contact
Searches HubSpot for a contact with the email address from the response.
-
HubSpot: Create Contact
Runs only if no contact was found. Creates one with the email and company from the response, and the Name answer as the first name.
-
HubSpot: Update Contact
Runs only if a contact was found. Updates that contact's company from the response.
What you need connected
You also need a Stepper account. Each app's page lists every trigger and action Stepper has for it.
How to set it up
- Sign in to Stepper, or create a free account.
- Click Use this template in Stepper. Stepper copies the workflow into your account and asks you to connect Google Forms and HubSpot if you haven’t already. Connect the Google account that owns the form.
- In the Google Forms trigger, choose your form.
- Check the HubSpot steps. They use answers to questions named Email, Name and Company. If yours are named differently, pick your own answers with the data picker in Find Contact, Create Contact and Update Contact.
- Submit a test response with a new email address and run a test, then submit another with the same address. You should see one contact, created and then updated.
- Click Publish.
What you can change
- What gets updated. Add more fields to Update Contact, such as phone number or job title, if your form asks for them.
- Lifecycle stage. Set a fixed Lifecycle Stage, such as Lead, on new contacts so they show up in the right view.
- Lists and deals. Add HubSpot’s Add Contact to List or Create Deal after the contact steps.